Milk Steaming 101
Master silky microfoam by choosing the right milk, keeping it cold, aerating briefly with proper steam wand positioning, and heating until too hot to touch.
- Whole milk is the gold standard for steaming and latte art, but Califia Farms oat milk steams exceptionally well for dairy-free alternatives
- Aerate milk for only a few seconds by positioning the steam wand halfway between center and edge, listening for a gentle hissing sound
- Stop steaming when the pitcher becomes too hot to touch (around 150-160°F) to achieve glossy, microfoam texture without scalding
If you’re among those of us who enjoy milk drinks like lattes or cappuccinos on a regular basis, you’ll know that steamed milk can make or break those drinks. And we’re not just talking about hot milk. The texture of the milk is extremely important to the taste. Not enough foam or too much foam will definitely affect your drink. Luckily, if you have an espresso machine at home, you’re in control. But that power comes with responsibility, so today, I’ll be giving you a few tips and guiding you through steaming silky smooth milk.
Picking the Right Milk
Our first tip is picking the right milk. Different kinds of milk have different balances of fat and protein, which makes a massive difference in how bubbles form. If you’re into the real stuff, you’ll want to get whole milk. Different whole milks can behave differently, but generally speaking, whole milk is the gold standard when it comes to latte art. If you feel like your specific milk might be holding you back, don’t be afraid to try a new brand. If you’re not into dairy, there are more great alternatives than ever. We highly recommend Califia Farms’ barista series milks. Their oat milk, in particular, is delicious, and I’d argue it steams even better than whole milk.

Mise en Place
Before you start steaming, and even before you pull your shot, make sure you have everything in order. If you leave your shot or pitcher of milk sitting around after they’re done, the crema will start to dissipate, and the milk foam will begin to separate. Being fully prepared will ensure you get the most out of both. First, you’ll want that milk nice and cold. The colder your milk is, the more time you’ll have to work in the foam. You’ll also want the right pitcher for the job. When you start steaming, the milk will be swirling around, and the foam will cause its volume to expand. With that in mind, you’ll want a pitcher that’s considerably larger than the volume of milk you plan to steam. Last, make sure you have a towel handy. You’ll use it to purge your steam wand of all the condensed water inside. No one wants watered-down milk. You’ll also want it close at hand when you’re finished to wipe down and purge the steam wand again.
Heating Things Up
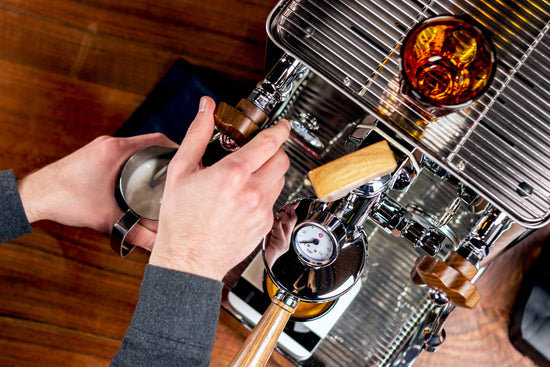
Now that we’ve got all the preparation details out of the way, let’s actually steam some milk. The most important thing to keep track of when steaming milk is the depth and position of your steam wand in the pitcher. In the first few seconds, we want to create a whirlpool of milk and carefully introduce air to make our foam. To do this, we’ll position the steam wand halfway between the center of the pitcher and the outer wall. This will keep the milk spinning and ensure everything is evenly mixed and heated. We’ll start with the steam tip entirely submerged in the milk. Now, flip on the steam.
The moment steam starts entering the milk, we want to slowly begin lowering the pitcher until we hear this sound (see video)…it indicates “aeration,” which means we’re gently introducing air into the milk. When you hear that sound, stop lowering the pitcher to keep aerating for just a few seconds or for longer if you enjoy extra foamy drinks. If you lower the pitcher too much, air will simply blast into the milk making huge bubbles — and probably a mess. On the other end of the spectrum, if you aerate too little, your milk will start screeching, and you’ll have hot but foam-less milk at the end.
After a few seconds of aeration, you’ll raise the pitcher so that the steam wand’s tip is submerged in the milk. This will continue to heat the milk without adding more foam. Keep your free hand against the side of the pitcher – when it becomes too hot to touch for more than a second, turn off the steam.
If all’s gone well, you’ll end up with this glossy, pearlescent sheen on the top of your milk with bubbles so small you can barely detect them. If you have a few larger bubbles mixed in, don’t fret. Just give the pitcher a couple of taps to work them out. Give your pitcher a few swirls to make sure the foam and milk are nicely integrated, and you’re ready to pour.
Pouring a Dot + Outro
Today, we’ll just pour a simple dot. Start pouring from 4-5 inches above the surface of the cup to mix the milk in with the espresso, keeping everything brown. When the cup is just about full lower the pitcher right down to the surface of the milk dead center. You should see your foam spill out onto the surface creating a white dot. If so, congrats! You just steamed great milk and created the simplest form of latte art.
For more in-depth training, check out Intro to Milk Steaming and Latte Art now available through Coffee School.